
When it comes to roofing, the importance of a proper underlayment cannot be overstated. Roof underlayment serves as a crucial protective layer between your roof covering and the structural roof deck, playing an essential role in extending the lifespan of your roofing system. This article will provide a detailed guide on Roof Underlayment Installation, highlighting its benefits and answering common questions to help you understand this vital component of your roofing project.
What is Roof Underlayment?
Roof underlayment is a synthetic or felt material installed beneath the primary roofing material, such as shingles, tiles, or metal panels. It acts as a secondary barrier to prevent water from penetrating the roof and protects the roof deck from the elements, including moisture, wind, and temperature fluctuations.
Types of Roof Underlayment
-
Asphalt-Saturated Felt: Traditional felt underlayment is made of cellulose or fiberglass saturated with asphalt. It is available in different weights, typically 15 or 30 pounds. While it is cost-effective, it is less durable compared to synthetic options.
-
Synthetic Underlayment: Made from polypropylene or polyethylene, synthetic underlayment is lighter, more durable, and offers better moisture resistance than felt. It is also resistant to tearing and UV damage.
-
Rubberized Underlayment: This type consists of a rubberized asphalt material that provides excellent waterproofing capabilities. It is commonly used in areas prone to ice dams or heavy rainfall.
Benefits of Roof Underlayment
-
Water Resistance: Underlayment acts as a barrier against water intrusion, protecting the roof deck and ensuring a dry interior.
-
Protection from Wind Uplift: A properly installed underlayment can help prevent shingles from lifting during high winds, reducing the risk of roof damage.
-
Ice and Water Shield: Certain underlayments, especially rubberized ones, provide additional protection against ice dams, preventing water from backing up and causing leaks.
-
Temperature Regulation: Underlayment can help regulate the temperature of the roof deck, preventing heat from escaping during winter and reducing heat buildup during summer.
-
Enhanced Roof Lifespan: By protecting the roof deck from moisture and temperature extremes, underlayment can extend the lifespan of your roofing system.
Steps for Roof Underlayment Installation
Installing Synthetic Roofing Underlayment is a straightforward process that requires careful planning and execution. Here’s a step-by-step guide to help you through the installation.
Step 1: Gather Materials and Tools
Before starting, ensure you have all the necessary materials and tools. You will need:
- Roof underlayment (felt or synthetic)
- Roofing nails or staples
- Utility knife
- Measuring tape
- Hammer or nail gun
- Ladder
- Safety gear (gloves, goggles)
Step 2: Prepare the Roof Deck
Ensure the roof deck is clean, dry, and free from debris, sharp objects, or any protrusions that could damage the underlayment. Inspect for any signs of damage or rot, and make necessary repairs before proceeding.
Step 3: Measure and Cut the Underlayment
Using a measuring tape, measure the length of the roof slope. Cut the underlayment into manageable sections, typically 10 to 12 feet long. Make sure to account for overlaps as you lay down each section.
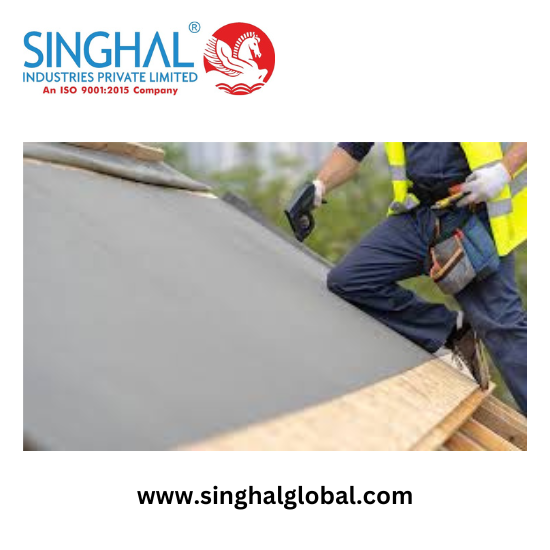
Step 4: Start at the Eaves
Begin the installation at the eaves, rolling out the underlayment horizontally across the roof. Position the bottom edge of the underlayment to extend over the eaves by about 1 inch. This will help direct any water runoff away from the roof deck.
Step 5: Secure the Underlayment
Secure the underlayment to the roof deck using roofing nails or staples. Place fasteners every 12 to 18 inches along the top edge and every 6 to 8 inches along the sides. Be sure to overlap each row of underlayment by at least 4 inches to ensure a watertight seal.
Step 6: Continue Up the Roof
Continue installing additional rows of underlayment up the roof, ensuring each row overlaps the one below. Repeat this process until the entire roof deck is covered. Pay special attention to valleys and ridges, where water runoff is concentrated.
Step 7: Seal Edges and Joints
Use roofing tape or sealant to secure edges and joints, especially in areas prone to leaks. This will further enhance the waterproofing capabilities of your underlayment.
Step 8: Inspect the Installation
Once the installation is complete, inspect the underlayment for any loose edges or gaps. Ensure everything is securely fastened and that there are no visible tears or damage.
Conclusion
Roof underlayment is an essential component of any roofing system, providing crucial protection against moisture and environmental factors. Proper installation of underlayment enhances the durability and longevity of your roof, ensuring your home remains safe and dry for years to come.
By following the steps outlined in this guide, you can confidently install roof underlayment and take the first step toward a more resilient Waterproof Roofing Underlayment system. Whether you are a DIY enthusiast or planning to hire a professional, understanding the importance of underlayment will empower you to make informed decisions for your roofing project.
In summary, roof underlayment is a small yet significant investment in your home's overall protection. Don't overlook this critical layer—ensure you include it in your roofing plans for lasting security and peace of mind.
Frequently Asked Questions (FAQs)
1. Is underlayment necessary for all roofing types?
While not all roofing systems require underlayment, it is highly recommended for most types, especially asphalt shingles, metal roofs, and tile roofs. Underlayment provides essential protection against moisture and extends the lifespan of your roofing system.
2. How long does roof underlayment last?
The lifespan of roof underlayment varies based on the material used and environmental conditions. Asphalt-saturated felt typically lasts around 10 to 20 years, while synthetic underlayment can last 20 years or longer.
3. Can I install underlayment myself?
Yes, installing roof underlayment can be a DIY project for those with some roofing experience. However, if you are uncomfortable working at heights or lack experience, it is advisable to hire a professional.
4. What is the cost of roof underlayment?
The cost of roof underlayment varies depending on the type and brand. Asphalt felt typically ranges from $15 to $25 per roll, while synthetic underlayment can cost between $30 and $50 per roll. Keep in mind that additional costs may be incurred for labor if hiring a professional.