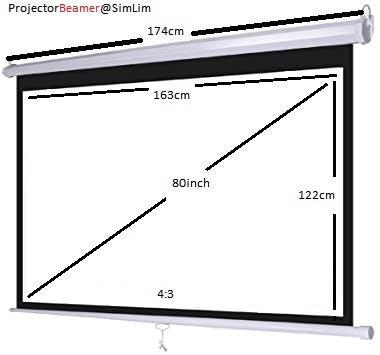
How to Set Up Your Projector Screen for Optimal Viewing

Welcome to our comprehensive guide on how to set up your projector screen for the best viewing experience possible! Whether you are hosting a movie night with friends or giving a presentation at work, getting your projector screen set up correctly is essential for optimal viewing. In this article, we will walk you through the steps to ensure that your projector screen is perfectly positioned for the best picture quality.
Choosing the Right Location
The first step in setting up your projector screen is choosing the right location. Make sure to select a wall that is flat and free of any obstructions. It is also important to consider the distance between the projector and the screen. The ideal distance will depend on the size of your screen and the throw ratio of your projector. Be sure to refer to the manufacturer's instructions for the recommended distance.
Mounting the Projector Screen
Once you have selected the perfect location, it is time to mount your projector screen. Most projector screens come with mounting brackets that make installation a breeze. Simply attach the brackets to the wall using screws and then hang the screen on the brackets. Make sure to double-check that the screen is level to avoid any distortion in the image.
Adjusting the Screen Height
The next step is to adjust the height of the projector screen. The center of the screen should be at eye level when seated for the best viewing experience. You may need to use an adjustable stand or mount to achieve the perfect height. It is also important to ensure that the screen is perpendicular to the floor to prevent any distortion in the image.
Connecting the Projector
Now that your projector screen is properly mounted, it is time to connect your projector. Make sure to use high-quality HDMI or VGA cables for the best image quality. Most projectors have multiple input options, so be sure to select the correct input source on the projector. You may also need to adjust the projector settings to match the aspect ratio of your screen.
Adjusting the Projector Settings
Once the projector is connected, it is important to adjust the settings for optimal viewing. This includes adjusting the brightness, contrast, and color settings to achieve the best picture quality. You may also need to adjust the keystone correction to ensure that the image is square and not distorted. Refer to the projector's manual for instructions on adjusting these settings.
Testing the Image
Before settling in for movie night or starting your presentation, be sure to test the image on your projector screen. Play a test video or display a test pattern to ensure that the image is clear and sharp. Make any necessary adjustments to the projector or screen position to perfect the picture quality.
Conclusion
Setting up your projector screen for optimal viewing is essential for a great viewing experience. By choosing the right location, mounting the screen correctly, adjusting the height, connecting the projector, adjusting the settings, and testing the image, you can ensure that your picture quality is top-notch. Follow these steps, and you will be enjoying crisp, clear images on your projector screen singapore in no time!
- Questions and Answers
- Opinion
- Story/Motivational/Inspiring
- Technology
- Art
- Causes
- Crafts
- Dance
- Drinks
- Film/Movie
- Fitness
- Food
- Juegos
- Gardening
- Health
- Home
- Literature
- Music
- Networking
- Other
- Party
- Religion
- Shopping
- Sports
- Theater
- Wellness
- News
- Culture
- War machines and policy

