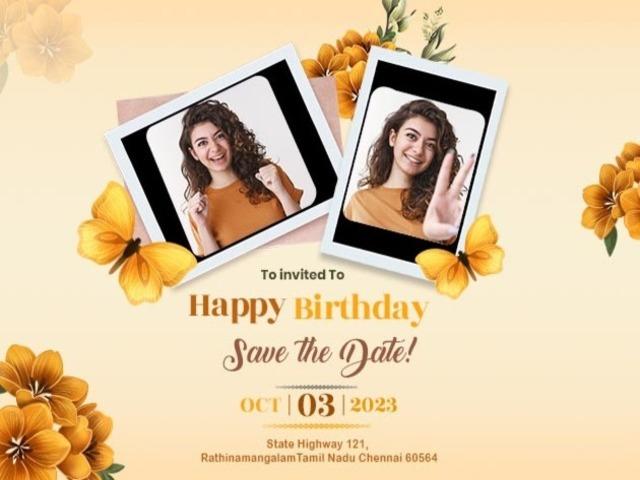
How to Design the Perfect Card for Birthday Invitations

Designing the perfect card for birthday invitations is an art that combines creativity, practicality, and personal touch. Whether you're crafting an invitation for a child’s birthday party, a milestone celebration, or a themed bash, the goal is to create a card that excites and informs your guests. In this comprehensive guide, we’ll walk you through the steps to design the perfect card for birthday invitation, ensuring your invite stands out and sets the right tone for the event.
Understanding the Basics
1. Determine the Purpose and Theme
The first step in designing the perfect card for birthday invitations is understanding the purpose and theme of the birthday party. Is it a casual gathering, a formal event, or a themed celebration? The theme will influence the design elements, colors, and overall style of the invitation.
Example Themes:
-
Children’s Parties: Fairy tales, superheroes, cartoons.
-
Adult Celebrations: Milestone ages, elegant dinner parties, surprise parties.
-
Seasonal Themes: Summer pool party, winter wonderland, autumn harvest.

2. Gather Essential Information
Before diving into the design, ensure you have all the essential information that needs to be included in the invitation:
-
Name of the Birthday Person
-
Date and Time of the Party
-
Venue Address
-
RSVP Details
-
Additional Information: Dress code, gift preferences, special instructions.
Designing Your Card for Birthday Invitation
3. Choose the Right Format
Cards for birthday invitations come in various formats. Decide whether you prefer a traditional printed card, a digital invitation, or a combination of both.
Formats:
-
Printed Cards: Classic and tangible, perfect for keepsakes.
-
Digital Invitations: Eco-friendly and easily shareable via email or social media.
-
Hybrid: Send digital invites but also print a few for special guests or as mementos.
4. Select a Suitable Template
Templates can be a lifesaver, especially if you’re not a professional designer. Websites like Crafty Art offer a plethora of customizable templates that cater to different themes and styles. Look for templates that align with your theme and have a user-friendly interface for editing.
5. Pick the Perfect Color Scheme
Colors set the mood and tone of your invitation. Choose a color scheme that reflects the theme of the birthday party. For instance:
-
Children’s Parties: Bright, bold colors like red, blue, yellow.
-
Elegant Parties: Subtle, sophisticated hues like gold, silver, pastels.
-
Seasonal Parties: Seasonal colors like orange and brown for autumn, green and red for Christmas.
6. Use High-Quality Images and Graphics
Images and graphics add life to your invitation. Use high-quality photos of the birthday person or themed graphics to make the invitation visually appealing. Ensure the images are clear and appropriately sized for the card.
7. Choose Appropriate Fonts
Fonts play a crucial role in the readability and aesthetic appeal of your invitation. Select fonts that are easy to read and match the theme of your card for birthday invitations. Avoid using too many different fonts; stick to two or three complementary ones.
8. Add Personal Touches
Personal touches make your invitation unique and special. Consider adding:
-
Handwritten Elements: Signatures, hand-drawn doodles.
-
Personal Messages: A heartfelt note or a fun rhyme.
-
Photos: Include a memorable photo of the birthday person.
9. Ensure Clarity and Legibility
While creativity is important, clarity should not be compromised. Ensure all the essential information is easy to read and not overshadowed by decorative elements. Use contrasting colors for text and background to enhance readability.

Crafting the Content
10. Write an Engaging Headline
The headline is the first thing your guests will notice. Make it engaging and relevant to the theme. For example:
-
Children’s Party: “Join Us for a Superhero Adventure at Liam’s 5th Birthday!”
-
Elegant Party: “Celebrate Sarah’s 30th Birthday in Style!”
11. Create Inviting Body Text
The body text should provide all necessary details in a concise and inviting manner. Use a friendly tone and keep the text to the point.
Example: “Come celebrate with us as we mark Jake’s 10th birthday! There will be games, cake, and lots of fun. Don’t miss out on the adventure!”
12. Include an RSVP Section
An RSVP section helps you manage the guest list and plan accordingly. Include clear instructions on how to RSVP, whether it’s via phone, email, or an online form.
Example: “RSVP by August 10th. Call or text Maria at (555) 123-4567 or email at rsvp@example.com.”
13. Add Extra Information
If there are any additional instructions or information, such as dress codes, special requests, or parking details, include them in a separate section.
Example: “Please wear your favorite superhero costume! Parking is available at the back of the house.”
Final Touches and Printing
14. Review and Proofread
Before finalizing your card for birthday invitations, review and proofread all the text. Check for spelling errors, grammatical mistakes, and ensure all the details are accurate.
15. Test Print
If you’re opting for printed invitations, do a test print to see how the final product looks. This helps in identifying any color or layout issues that need adjustment.
16. Choose Quality Printing Options
For printed cards, choose a quality printing service that offers good paper and print quality. Consider options like matte or glossy finishes and thicker cardstock for a premium feel.
17. Digital Invitation Considerations
If you’re sending digital invitations, ensure the file size is optimized for easy sharing without compromising on quality. Use formats like PDF or high-resolution JPEG.
Tips for a Memorable Invitation
18. Be Creative with Envelopes and Packaging
If you’re sending physical invitations, don’t forget about the envelope. Choose envelopes that complement the invitation card. You can add stickers, ribbons, or wax seals for an extra touch of elegance.
19. Send Invitations Timely
Send out your invitations well in advance to give your guests ample time to RSVP and make necessary arrangements. Typically, 4-6 weeks before the event is a good timeframe.
20. Follow Up
As the event date approaches, follow up with guests who haven’t responded to ensure you have an accurate headcount.
Conclusion
Designing the perfect card for birthday invitations requires a blend of creativity, attention to detail, and a personal touch. By following the steps outlined in this guide, you can create an invitation that not only informs but also excites and engages your guests. Whether you’re designing a fun-filled card for a child’s party or an elegant invite for a milestone birthday, the key is to make it memorable and reflective of the celebration’s spirit. Happy designing!
Creating a card for birthday invitations can be a joyful and fulfilling experience, especially when you see the smiles it brings to the faces of your guests. With the right approach and a bit of creativity, you can craft an invitation that sets the perfect tone for an unforgettable birthday celebration.
- Questions and Answers
- Opinion
- Story/Motivational/Inspiring
- Technology
- Art
- Causes
- Crafts
- Dance
- Drinks
- Film/Movie
- Fitness
- Food
- Giochi
- Gardening
- Health
- Home
- Literature
- Music
- Networking
- Altre informazioni
- Party
- Religion
- Shopping
- Sports
- Theater
- Wellness
- News
- Culture
- War machines and policy

