
how to connect canon printer to new wifi windows 11, but with the right steps, it can be a straightforward process. This guide will walk you through each step to ensure your printer is connected to your network and ready to use.
Step 1: Prepare Your Printer
Before you start the connection process, make sure your printer is turned on and ready to connect. Check the printer's display panel to ensure it is not in sleep mode.
- Power On: Ensure your Canon printer is powered on.
- Reset Wi-Fi Settings (if necessary): If your printer was previously connected to a different network, you might need to reset its network settings. This can usually be done via the printer’s settings menu. Refer to your printer’s manual for specific instructions.
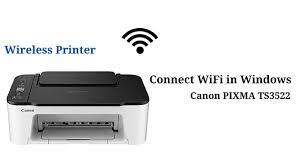
Step 2: Connect Your Printer to Wi-Fi
Most modern Canon printers have a built-in Wi-Fi setup wizard. Here’s how to use it:
- Navigate to Wi-Fi Setup: On your printer’s display panel, go to the Wi-Fi setup menu. This is often found under settings or network settings.
- Select Wi-Fi Setup Wizard: Choose the Wi-Fi setup wizard option.
- Choose Your Network: The printer will search for available Wi-Fi networks. Select your network from the list.
- Enter Password: Enter your Wi-Fi password using the printer’s keypad. Confirm to connect.
Step 3: Install Printer Drivers on Windows 11
To ensure that your Canon printer works seamlessly with Windows 11, you may need to install or update the printer drivers.
- Download Drivers: Visit the Canon official website and navigate to the support section. Enter your printer model to find and download the latest drivers for Windows 11.
- Run Installer: Open the downloaded file and follow the on-screen instructions to install the drivers.
Step 4: Add Printer to Windows 11
Once the printer is connected to the Wi-Fi network and the drivers are installed, you need to add the printer to Windows 11.
- Open Settings: Click on the Start menu and select Settings (the gear icon).
- Navigate to Devices: In the Settings menu, click on “Bluetooth & devices”.
- Add Printer: Click on “Printers & scanners” and then “Add device”.
- Select Your Printer: Windows 11 will search for available printers. Select your Canon printer from the list and follow the prompts to add it.
Step 5: Test the Printer
After adding the printer, it’s essential to test it to ensure everything is set up correctly.
- Print a Test Page: Go back to “Printers & scanners” in the Settings menu, select your Canon printer, and click “Manage”. Choose “Print a test page” to verify the connection.
Troubleshooting Tips
If you encounter any issues, here are some common troubleshooting steps:
- Check Wi-Fi Signal: Ensure your printer is within range of your Wi-Fi router and there are no obstructions.
- Restart Devices: Sometimes, simply restarting your printer, computer, and router can resolve connectivity issues.
- Update Firmware: Ensure your printer’s firmware is up to date by checking for updates on the Canon website.
- Firewall Settings: Check if your firewall is blocking the printer from connecting to the network. Adjust settings if necessary.
By following these steps, how to install canon printer without cd. Whether you're setting up a printer for the first time or reconnecting to a new network, this guide provides all the information you need to get your Canon printer up and running.