
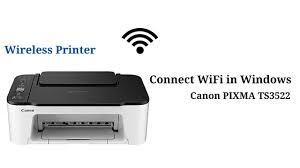
how to connect canon printer to new wifi windows 11. Whether you've just upgraded your Wi-Fi network or moved to a new location, this guide will help you get your Canon printer back online.
Step 1: Prepare Your Printer and Computer
Before starting the connection process, make sure:
- Your Canon printer is turned on and within range of your Wi-Fi network.
- Your Windows 11 computer is connected to the same Wi-Fi network you want your printer to connect to.
- You have the Wi-Fi network name (SSID) and password handy.
Step 2: Reset Network Settings on the Printer
If your Canon printer was previously connected to another network, it might be helpful to reset its network settings:
- On the printer’s control panel, navigate to the Setup or Settings menu.
- Select Device settings.
- Choose Reset settings or Reset LAN settings.
- Confirm the reset action.
Step 3: Connect the Printer to the Wi-Fi Network
Use one of the following methods to connect your Canon printer to the new Wi-Fi network.
Method 1: Using the Printer’s Control Panel
- On the printer’s control panel, go to the Wi-Fi or Network settings.
- Select Wi-Fi Setup Wizard.
- Choose your Wi-Fi network from the list of available networks.
- Enter your Wi-Fi password using the printer’s keypad.
- Confirm and complete the connection process.
Method 2: Using WPS (Wi-Fi Protected Setup)
- Ensure your router supports WPS and that it is enabled.
- On your printer’s control panel, go to Wi-Fi or Network settings.
- Select WPS (Push Button).
- Press the WPS button on your router within 2 minutes.
- The printer should automatically connect to the Wi-Fi network.
Step 4: Install or Update Printer Drivers on Windows 11
- Open Settings on your Windows 11 computer.
- Go to Bluetooth & devices > Printers & scanners.
- Click on Add a printer or scanner.
- Windows will search for available printers. Select your Canon printer from the list.
- If the printer is not detected automatically, click on The printer that I want isn’t listed.
- Follow the prompts to add your printer manually.
Alternatively, you can download the latest drivers from Canon’s official website:
- Visit the Canon support page.
- Enter your printer model and download the appropriate drivers and software.
- Install the downloaded drivers and follow the on-screen instructions.
Step 5: Test the Printer
After completing the installation, test your printer to ensure it is connected properly:
- Open any document or image on your computer.
- Press Ctrl + P to open the print dialog.
- Select your Canon printer from the list of available printers.
- Click Print to start a test print.
Troubleshooting Tips
- Ensure Printer is On and Connected: Verify that your printer is powered on and that the Wi-Fi indicator is lit.
- Check Wi-Fi Signal: Make sure your printer is within range of your Wi-Fi router.
- Re-enter Wi-Fi Credentials: Double-check the Wi-Fi SSID and password you entered.
- Restart Devices: Sometimes, restarting your printer, router, and computer can resolve connectivity issues.
- Update Firmware: Ensure your printer’s firmware is up to date. Check Canon’s support website for any available updates.
By following these steps, how to install canon printer without cd, ensuring smooth and efficient printing. If you encounter any issues, refer to your printer’s manual or contact Canon support for further assistance.